How to create Personalised / Customised Views on your website
There are many reasons why one would want to create customised views of the website, they frequently visit. Users are mostly interested in only a small section of the website and are always desperate to get the information with minimum clicks.
Why personalised views
As a user, I am interested only on notifications, alerts or disruptions that affect me. Hence, I wish to get that information in the quickest possible way. This creates a strong proposition for one to create personalised websites.
How can we do it
We can leverage the power of local storage to create personalised views for each and every user. This has many advantages compared to Single Sign-On Users.
1) Local storage lies on the client side and hence is fast compared to fetching view-specific data from the database on the server
2) Local storage can be easily cleared and the customised view can be easily reconstructed with local storage afresh.
3) Practically no infrastructure support is required
4) Development time is reduced considerably due to above reasons
Who has done it
Transport for London (TfL) has shown the way in this direction. Its award winning website attracts over 20 million visitors a month, which shows the scale of its operations. Recently, TfL has launched the Personalisation feature on its website.
If you now launch the TfL website, you will notice a "Star" icon at the extreme right. Clicking on the "star" starts your personalisation "journey".
What all can I personalise and how does it look
If the user has not favourited any part of the website then it will be presented with a list of options that user can 'favourite'.
First Time User Mode
This is the mode when the user has not customised any part of the website.
In this mode, the user is presented the option to favourite any or all of the tube lines (including London Overground, TfLRail and DLR), buses, Roads, River buses, Trams and Emirates Cable car.
So, you can see that as a user, you can customise your views for all these modes of transport from the website.
Add / Edit Mode:
In this mode, users can add or edit the modes for which they wish to view disruptions. Clicking on the "Lines" link presents the option to add or edit the tube lines.
As you can see tube lines favourited would be "starred". "Starred" lines would be added to your customised view and any disruptions on those lines would be visible to you across the website.
Status mode:
In this mode, all the favourited lines are visible alongwith their "status" information. If there is any disruption on your favourited lines then those will be visible in this mode.
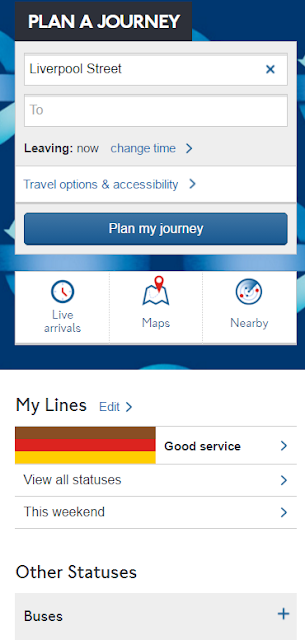
Base on the above, you will appreciate that this personalised feature reduces the real-estate of the website by providing users only the information they are interested in. Moreover, showing all the customised views as an overlay across the website enhances the visual appeal of the website. As the website is fully responsive, it caters to most of the mobile devices by providing a comparable user experience (UX) as a native app !
Can I get customised view on home page
TfL has smartly thought out the possible places where customised views would increase user-acceptability of personalisation feature. As a result they have elevated customised views on the Home Page (Landing page) as well.
This completes the personalisation journey for 1 mode of transport and as you can see how it enhances the user engagement by providing features that 'you' are interested in.
All the modes of transport can be added to your views in a similar way except for buses. So, next time we will take a look at the buses.
Note: This blog post is not endorsed by TfL in any way and am just one of the developers on this project. It is my endeavour to share my learnings from my work and highlighting the concepts through websites or data available in public domain.
So, play with it, like it, drop in your comments.


